Self-Tanning Tips: Don’t Skip The Prep
Did you know that the key to a flawless tan is not just about finding the right formula or mastering the application technique? One of the most critical steps in your self-tanning routine is the preparation. Seasoned sunless tanners know that prepping your skin properly can make all the difference between a streaky, uneven tan and a beautifully smooth, natural-looking glow. Read on about why self-tanning prep is just as important as the formula and application—and how you can achieve the best results.
Exfoliation: The Foundation of a Flawless Tan
The first and most crucial step in your self-tanning prep is exfoliation. Self-tanner

has a tendency to cling to dry and rough areas of your skin, leading to dark patches and an uneven tan. To avoid this, it's essential to exfoliate your skin thoroughly the day before or at least six hours before applying your self-tanner.
Exfoliation removes dead skin cells, creating a smooth and even surface for the self-tanner to adhere to. This helps prevent the self-tanner from accumulating in dry patches and ensures a more even application. Use a gentle body scrub or an exfoliating mitt to slough off any dead skin cells. Pay extra attention to rough areas like elbows, knees, ankles, and heels, as these areas are prone to dryness and can absorb more self-tanner, leading to darker spots. Avoid using oil-based exfoliators, as these can leave a residue on your skin that may interfere with the absorption of the self-tanner.
Featured Product: In The Buff Exfoliating Mitt
Hair Removal: Timing is Everything
If you prefer your skin to feel silky smooth, then hair removal is a must-do step before self-tanning. However, timing is key here. Make sure to remove hair 12-24 hours before you plan to apply your self-tanner. This window allows enough time for your hair follicles to close, which helps prevent the self-tanner from settling into the pores and creating a "dot-like" pattern on your legs or other areas. This also minimizes the risk of irritation, especially if you have sensitive skin.
Shaving, waxing, or using a depilatory cream are all effective methods, but each comes with its own prep needs. For shaving, use a fresh razor and a moisturizing shaving cream to avoid nicks and cuts. For waxing, ensure that all wax residue is removed, as it can act as a barrier to the self-tanner.
Moisturizer: Hydration Without Interference
Keeping your skin hydrated is essential, but it's important to moisturize wisely before self-tanning. Moisturize immediately after exfoliating to lock in moisture, but avoid applying lotion just before tanning as it can create a barrier on the skin. Pay special attention to moisturizing areas prone to dryness, like your elbows, knees, and ankles, as these spots tend to absorb more tanner. A lightweight, oil-free moisturizer is ideal for these areas.

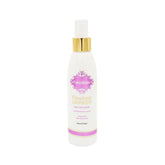
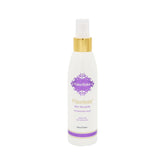
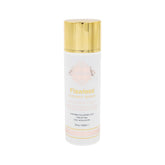
Featured product: Mistifier Oil-Free Moisturizer + Continuous Spray Bottle
Before applying your self-tanner, make sure your skin is clean and dry. Any oils, sweat, or residue can affect the tan’s development and lead to streaks.
The Post-Tan Plan: Maintain Your Glow
Your prep doesn’t end with the application. To ensure your tan lasts longer and fades evenly, continue to hydrate your skin daily with a gentle moisturizer. Limit exfoliating until you’re ready to remove the tan and start fresh.
Prepping for your self-tan is just as important as the application itself. By exfoliating, timing your hair removal, moisturizing and ensuring your skin is clean and dry, you set the stage for a flawless, even tan. With these steps in mind, you'll be well on your way to achieving a beautiful, streak-free glow that lasts!

