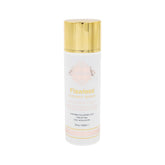
Get An Instant Self-Tan That Lasts Longer
Wondering how to prepare your skin to make your self-tan last longer? We have your answers! Achieve a flawless and long-lasting sunless tan with these easy steps.
Step 1: Shower And Exfoliation
Start your day with a refreshing shower. Use a good exfoliator to scrub your entire body, removing dead skin cells and creating a smooth canvas for your self-tanner. Focus on rough areas like elbows, knees, and ankles. This ensures an even application and prevents patchiness. Shave or wax at least 24 hours before tanning to allow your pores to close and skin to calm.
Step 2: Moisturize Strategically
Hydrated skin absorbs self-tanner more evenly. After your shower, dry off completely. Apply a light, oil-free moisturizer all over your body. Pay special attention (again!) to areas where self-tanner tends to settle and streak, such as elbows, hands, feet, and ankles. Apply a generous layer of moisturizer to these spots.
Step 3: Self-Tanner Application

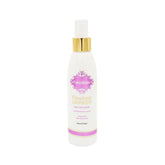
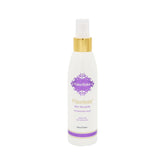
First, choose the right self-tanner. Different formulations work better for different skin types. Gradual tanners are great for beginners, while mousse or spray is ideal for a quick, deep tan. Use an application mitt for even distribution. Dispense 2-3 pumps of self-tanner foam onto your tanning mitt, then apply in a circular motion. Rub the sunless tanner into your skin and ensure you cover all areas thoroughly. Work in small sections, blending well as you go, to avoid missed spots and streaks.
Step 4: Building Depth Of Color
Begin by evenly applying a single layer of self-tanner over your entire body. Ensure thorough coverage for a uniform base. Allow this first layer to dry completely. Wait for about 1-2 minutes to ensure the product is fully absorbed and dry to the touch. This step is crucial to avoid streaks and uneven patches. Apply a second layer of tanning product, repeating the same thorough and even application process. This layer will deepen your tan and enhance the initial color. For a richer, darker tan, apply additional layers as needed. Each layer should be allowed to dry completely before applying the next.
Step 5: Immediately After Application
After your final coat is dry, wear loose-fitting clothing. Slip into a lightweight robe or loose-fitting clothes you don't mind getting stained. The color will wash out easily later. Allow the tanner to dry for a couple of hours. Avoid sweating or getting your skin wet during this time, including washing your hands, to allow the tan to fully develop
Step 6: Overnight Development

After applying the self-tanner, avoid showering before bed. This allows the color to develop properly throughout the night. The longer the self-tanner stays on your skin, the more effectively it will activate. Ideally, let it develop for a full 24 hours. Shower the next morning. During this shower, you may notice some color washing off. It's normal to see some of the excess instant color rinse off in the shower. This does not affect the final result. The true tan will have developed beneath this layer.
Step 7: Maintaining Your Sunless Tan
If you prefer a deeper tan, you can repeat the application process after your morning shower, skipping the exfoliation and moisturizer steps. This will help you build a solid base tan. Once you've achieved the desired depth, you can maintain it with weekly applications. For a consistent and lasting tan, apply the self-tanner weekly for touch-ups. Each week, after your shower, apply the self-tanner evenly to maintain a consistent color. Ensure your skin is dry and free of any oils or lotions before each application.
By following these steps, you'll be able to enjoy an instant, sun-kissed glow that lasts longer and looks more natural.

