Your New Self-Tan routine For Spring
We’re talking spring break plans! If you are thinking about working up your gorgeous glow for spring, we’ll help you get started and maintain a self-tan you can keep all year long. A Successful self-tanning routine involves several key steps to ensure a smooth, even application and long-lasting results. Here's a comprehensive plan to follow for your best sunless tan:
Self-Tan Routine Part 1: Preparation
Exfoliation - Start by exfoliating your skin to remove dead skin cells, which can

cause uneven tanning. Focus on rough areas like your elbows, knees, and ankles. Be sure to use a gentle exfoliating scrub or mitt, like our In The Buff Exfoliating Mitt.
Shaving or Waxing - If needed, shave or wax at least 24 hours before applying self-tanner. This helps prevent irritation and ensures an even application.
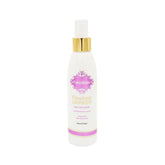
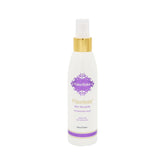
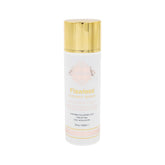
Hydration - Moisturize your skin, paying attention to drier areas. However, avoid using heavy lotions or oils immediately before tanning, as they can create a barrier and inhibit absorption of the tanner. Mistifier Oil-Free Moisturizer is a great choice!
Self-Tan Routine Part 2: Application
The Right Product - Select a self-tanner that suits your skin type and desired outcome (e.g., gradual tan, instant tan, tinted, etc.). Consider factors like your skin tone and whether you want a subtle or deep tan.
Patch Test - With a new product, perform a patch test on a small area of your skin to check for any adverse reactions. You might want to wait several hours to ensure no irritation occurs before proceeding with full-body application.
Application Technique - Start with a small amount of self-tanner to avoid streaks and buildup. Apply in circular motions for even coverage, working from bottom to top. Use sparingly on areas prone to darker color buildup, like your elbows, knees, and ankles.
Face Application - Use a self-tanner specifically formulated for the face or dilute your body self-tanner with moisturizer for a lighter application. Blend carefully, focusing on areas where the sun naturally hits (forehead, cheeks, nose, and chin).
Glove or Mitt - Wear a tanning glove or mitt to protect your hands from staining. Blend product thoroughly, including between fingers and around nails.
Drying Time - Allow the self-tanner to dry completely before dressing to avoid transferring color onto clothing. Follow the product instructions for recommended drying time.
Self-Tan Routine Part 3: Aftercare

Avoid Water and Sweating - Refrain from activities that cause sweating or water exposure for at least six to eight hours post-application to allow the tan to develop fully.
Moisturize Regularly - Hydrate your skin daily to maintain your tan and prevent it from fading unevenly. Opt for a moisturizer that is free from harsh ingredients that can strip the tan.
Touch-Ups - Monitor your tan's appearance and touch up as needed with additional self-tanner. Gradual tanning lotions can be used to prolong the tan or deepen the color gradually.
Exfoliate for Even Fading - As your tan starts to fade, exfoliate your skin again to ensure an even transition back to your natural skin tone.
By following these steps in this sample self-tan routine, you can achieve a natural-looking, streak-free tan that lasts longer and fades evenly, for spring break and beyond! Contact us with any questions about getting the most from your Fake Bake products.
