How to Self-Tan Your Face
Never fear! With proper preparation, self-tanning your face shouldn't be difficult (plus, if you make a mistake, you can always use our Fake Bake Tan Corrector & Eraser).
Below is a complete guide to achieving a smooth, natural-looking and gorgeous fake tan on your face:
1. Get Ready - Before you begin to self-tan your face, eat, drink, brush your teeth - do whatever you need to that involves movement of your facial muscles. The reason is that these activities can cause streaks, or you might accidentally rub off some of the self-tanner if you do them too soon after application.

2. Exfoliate, Moisturize, Tighten - Pull back all your hair and pin it up to get it out of your way. Prepare your skin using Fake Bake Coconut Exfoliating Wipes or an exfoliating cleanser/scrub that does not contain oil. Our Coconut Exfoliating Wipes contain hydrating and smoothing coconut oil, but if you're using a different product, lightly moisturize any dry areas of your face. Self-tanning formulas tend to absorb unevenly in dry skin areas.

To tighten pores prior to applying a self-tanner, many experts recommend running an ice cube over your skin. Or go all out with an ice facial, which can benefit your skin in many ways.
3. Choose Your Self-Tanner - Use waterproof gloves (nitrile gloves are included in all Fake Bake products) to protect your hands while applying your sunless tanning formula. While Fake Bake has several excellent self-tanning products, all of which can be used on the face, we especially recommend The Face Anti-Aging Self-Tan Lotion with Matrixyl-3000. This product is made from exceptional ingredients, including clinical levels of Matrixyl-3000 (from Sederma). The Face Anti-Aging Lotion nourishes your skin, helps reverse signs of aging and reduces the appearance of fine lines and wrinkles. Its botanicals also soothe and hydrate your delicate facial skin. Whichever self-tanner formula you choose, make sure that none of the ingredients will irritate your skin beforehand.
4. Apply and Blend - Using circular motions, massage approximately a dime-sized dollop of facial self-tanner into the areas where you would naturally tan: your forehead, apples of your cheeks, bridge of your nose and chin. Lightly blend from these spots to the rest of your face, including slightly past your hairline and beneath the jawbone. A soft brush or mitt may be helpful in blending the self-tanner into these latter areas.

5. Best Practices for Face - Be particularly light with the tanner around your nostrils and upper lip, as these areas tend to absorb more of the solution. Avoid the eyelids and eyebrows altogether, as tanning solutions can cause these areas to turn orange. Continue to apply your self-tanner down your neck, as well as on and around your ears for an even glow. Use less product on your ears and neck to make the color on these areas look natural.
The color tone you should aim for on your face is slightly lighter than the rest of your skin; if it's darker, it will look unnatural. It's best to start light, then gradually build more color with subsequent tanner applications. The Face Anti-Aging formula is a gradual tanner, meant for nighttime applications that develops while you sleep. It can also be used during the day as a tinted moisturizer as well. Either way, you're in control of the depth of color you desire.
Keep the Glow Going
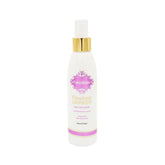
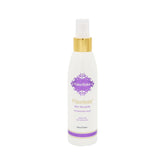
After applying self-tanner, don't wash your face until the tanner has developed fully. Otherwise, you risk washing off or fading your tan. To maintain your face tan, be sure and keep your skin hydrated every day with a light, non-greasy moisturizer. Avoid exfoliating products containing retinols, glycolic acid, salicylic acid and benzoyl peroxide (the latter two are common acne treatments), as these will cause your face tan to fade faster. If you find your face tan fading faster than you like, consider adding a small amount of self-tanner to your moisturizer. Fake Bake Tanning Water and Fake Bake Flawless Self-Tan Liquid are a couple of our products that would work well for this purpose.
On the other hand, you may decide to simply moisturize and enjoy your beautiful, bronzed face for 7 to 10 days, and then exfoliate before repeating the facial self-tanning technique from the beginning. The more times you apply self-tanner on your face and body, the more practiced and skilled you'll become. You'll also learn which products and ways of maintaining your self-tan work best for your own skin.
It is very important to realize that after self-tanning, you still need to protect your skin from the sun, since self-tanning lotion does not include sunscreen. For your face, use an oil-free sunscreen that won't clog your pores and reapply as necessary. UV protection from any type of sunscreen typically breaks down after about two hours.


Play Up Your Best Features
To get the most from your self-tan, use a Fake Bake blush or bronzing lotion to highlight the magnificence of your complexion. These products also help give your skin tone an extra boost between self-tan applications. Fake Bake cosmetics include a generous-sized compact bronzer, easy to apply evenly with our soft kabuki brush, a bronzing lotion and our Legal Sunburn Blush, a specially formulated color duo designed to add sun-kissed color to your lovely, self-tanned cheeks or anywhere you want.

