8 Steps to a Professional-Looking Sunless Tan
Are you ready to get a gorgeous self-tan - the absolute best way to have the beautiful sun-kissed skin tone you want without ultraviolet damage from the sun itself? Here are the steps to an even, professional-looking self-tan:
1. Choose your Tanner - Decide the type of self-tanning product you want to use, because there are several choices, including lotions, sprays, gels and mousses. Some develop gradually over a few days to a week, while others give you an instant tan.
2. Shave & Exfoliate - Prior to applying your self-tanner, it is suggested that you shave your legs using a new razor. Then, exfoliate your skin with an in-shower product that won't leave an oily residue. Or better yet, skip the shower and use our Fake Bake Coconut Exfoliating Wipes to remove dead skin cells. Apply more abrasion where skin is thickest, like the elbows, knees and ankles.

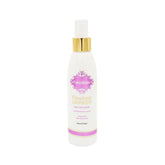
3. Moisturize Thicker-Skin Areas - After you have completely dried off after your shower, use an oil-free product like our Fake Bake Oil-Free Mistifier Body Spray to lightly moisturize the elbows, knees and ankles only. These areas tend to absorb too much self-tan solution, so this light moisturizer will help dilute that effect.

4. Apply your Self-Tanner - Proceed to apply your sunless tanning lotion in a cool, dry place, since sweat or any moisture on your skin can cause streaking and marks. Working on one area at a time (e.g. legs, arms, hands, etc.), apply your self-tanning lotion. For the larger areas like legs and arms, the best technique is to use an application mitt, which will prevent the tanning lotion from staining your hands. You might also choose to wear waterproof application gloves to further protect your hands. After applying the tanning lotion to the mitt, massage into each section of your skin using a circular motion.
5. Elbows, Knees and Ankles - For these areas, make sure you apply a thinner layer of self-tanning lotion, since these thicker-skin areas tend to absorb more of the lotion as mentioned above, resulting in darker tones that are not even with the rest of your tan. You can dilute the amount of lotion at these spots with oil-free moisturizer and/or by going over them more lightly with the self-tanning lotion.
6. Self-Tanner for Face - For your face, tan using The Face Anti-Aging Self-Tan Lotion with Matrixyl-3000, which is specifically formulated to renew aging skin, decrease the appearance of wrinkles, and hydrate with botanicals. Use your hands (with gloves) to apply the self-tanner, starting with the natural tan-points of your face, such as your cheeks, chin, forehead and bridge of your nose. Then spread the product to all areas, being careful to cover easy-to-miss areas like behind the ears and under the jaw.
7. Fingers, Toes and Knees - While applying a self-tanner to these spots, it is recommended that you use a sponge brush, blending the lotion into these areas for a natural effect. If you get lotion onto your palms (or soles of your feet), remove these stains immediately using Fake Bake Tan Corrector & Eraser. Then wipe with Fake Bake Coconut Exfoliating Wipes, not water, to remove any remaining marks.
8. Your Back - To apply sunless tanning lotion to the back and any other hard-to-reach areas, use our machine washable Fake Bake Body Mate 360° Self-Tanning Applicator, which makes it easy to apply lotion anywhere. If you're using lotion, make sure to fold the applicator to spread the self-tanner prior to applying.

Depending on the product used, note over the following days or weeks if spots need to re-tanned, or lightened using our Fake Bake Tan Corrector & Eraser. Now enjoy your lovely tan!

